BTS: Still Life with Golden Goblet
Welcome to another edition of behind-the-scenes! As you might guess, I spend a decent amount (too much) of time on Instagram, scrolling to keep up with trends, clients, and for the occasional glance of inspiration. One of my favorite accounts, since my summertime obsession with still lifes began, is History Eats, which is run by Dr. Eleanor Barnett. Dr. Barnett posts gorgeous old paintings featuring food and drink and contextualizes them, and her work is equal parts educational and inspiring for me.
Inspiration Photo
I reached out to Dr. Barnett a few months ago and asked if we could collaborate somehow. The result was a photo challenge based on this photo: Pieter de Ring’s “Still Life with Golden Goblet” (1650).

I had so much fun building out this set and recreating this photo—there’s something about the way artists captured light on food that speaks to me. Here’s a peek at my process, along with the final photo.
Sourcing Props for Still Life Food Photography
Obviously, there’s a lot going on in this still life. An overflowing bounty of grapes, a whole lobster, ripe peaches, two oysters, loaves of bread, one single crab, and fresh-peeled citrus were all on my shopping list. In an effort to keep this project reasonable, my goal was to spend less than $90 on the set. An anyone who has grocery shopped this year might guess, most of that ended up going towards food. *insert melting face emoji here*
I can’t handle the idea of a real lobster and crab (I am a wuss!), so I got plastic ones from Amazon to use instead. Everything else I sourced from my favorite produce prop shop, Valli Produce.
The eponymous golden goblet became my white whale. I looked at all of my best prop sources, but I just couldn’t find anything that matched the color and the height. I thought about using a piece of carnival glass, but then I found the glass hurricane at Goodwill. I knew that if I could build height into the scene, the colors wouldn’t matter quite so much, so that’s what I went with in the end. All of the other dishware was easy to find, and I actually ended up adding some extra candle holders for height. I had found the perfect plate to balance on the teapot and then promptly broke it while I was styling the scene. Nobody who knows me will be surprised with this turn of events.
Studio Set-Up for Still Life Food Photography
Here’s what I was looking at: after a few false starts, I ended up using a big ol’ diffuser that helped wrap the light up and down the scene. Originally, I had the light coming straight from the left, but after a few test shots, I realized that I wanted the light to come from the front left to better illuminate the lobster.

The back “wall” was built by clipping a vinyl backdrop to a hanging velvet curtain. It’s janky, but it works!
Equipment for Still Life Food Photography
My camera (Canon EOS 6D Mark II) and a tripod for the camera
My strobe light and trigger (Godox AD400 Pro) and a tripod for the light
A rectangular diffuser (roughly 1x4 feet) fitted with a single white cover
My dining room table, built by my dad (hi, Dad!)
Backdrops and velvet curtains from my collection
Lots and lots of Photoshop
Post-Production
Because I moved so many things around as I was setting this scene up, I had a lot of frames that I wanted to incorporate into the final image. You may remember from this post that when I pull individual elements from different photos (what we call “compositing” in the biz), I do that in Photoshop after I’ve edited all of them individually. That way, they all look the same to begin with.
Besides the composites, there weren’t too many things to tweak in post. I deviated greatly from my typical treatments and played around a bit to get as close to the painting as I could—pulling down the contrast, saturating or desaturating certain parts of the image, and manipulating the shadows and the highlights.
The Final Photo
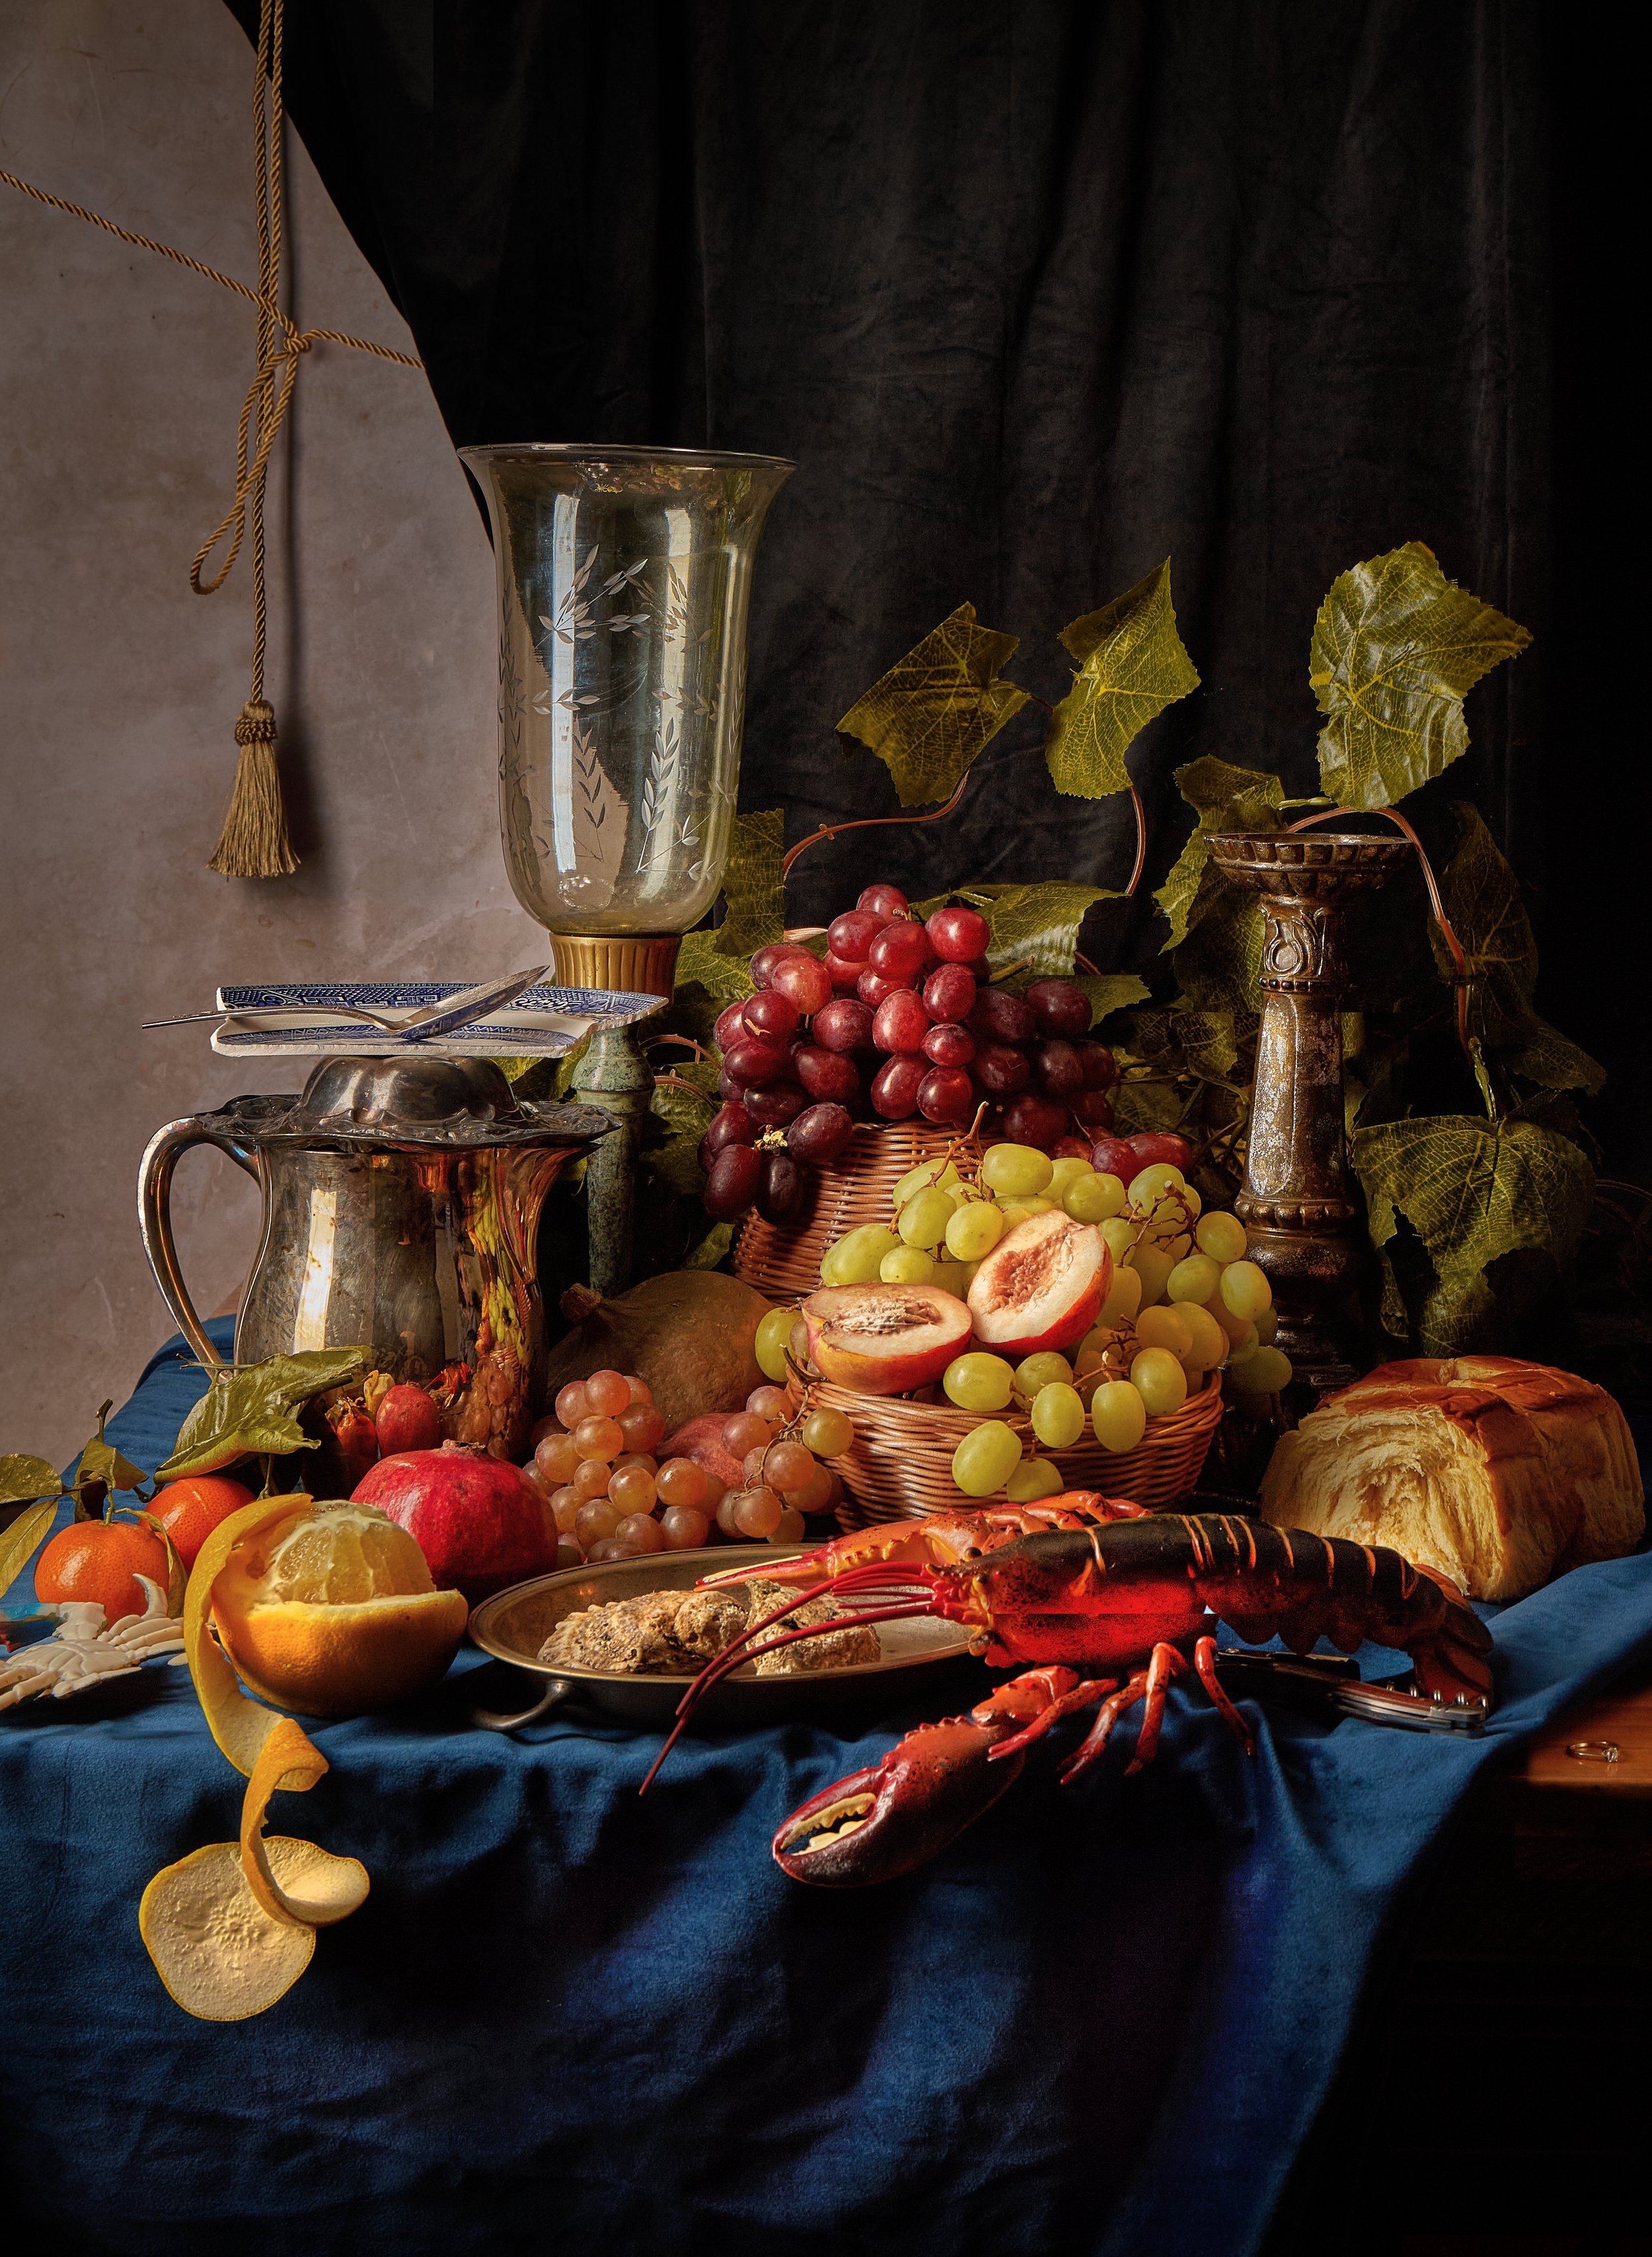
Not gonna lie—I’m pretty proud of this one, especially to look at the side-by-side. It was so fun to live in this dynamic, rich still life for a few hours, and when I logged onto Instagram earlier tonight and saw that a few other people had used the photo as inspiration for their own creative shoots, my heart grew three sizes. The takeaway here: find inspiration wherever you can and make something beautiful.

Original vs my version!